THE HEALTHY LIVING JOURNAL
How to Do a Wall Push-Up
Learn where to place your hands and feet, how to lower with control, and how to adjust a standing push-up to your starting level.
General educational information · Sources listed below
Find a clear wall and set your feet
A wall push-up lets you practice a pushing movement while standing. You can change how much work your arms do by moving your feet closer to the wall or farther away. For a first try, choose a solid wall with enough clear space for your hands and feet. Move loose rugs and anything you could step on out of the way. Avoid leaning on a door that might open.
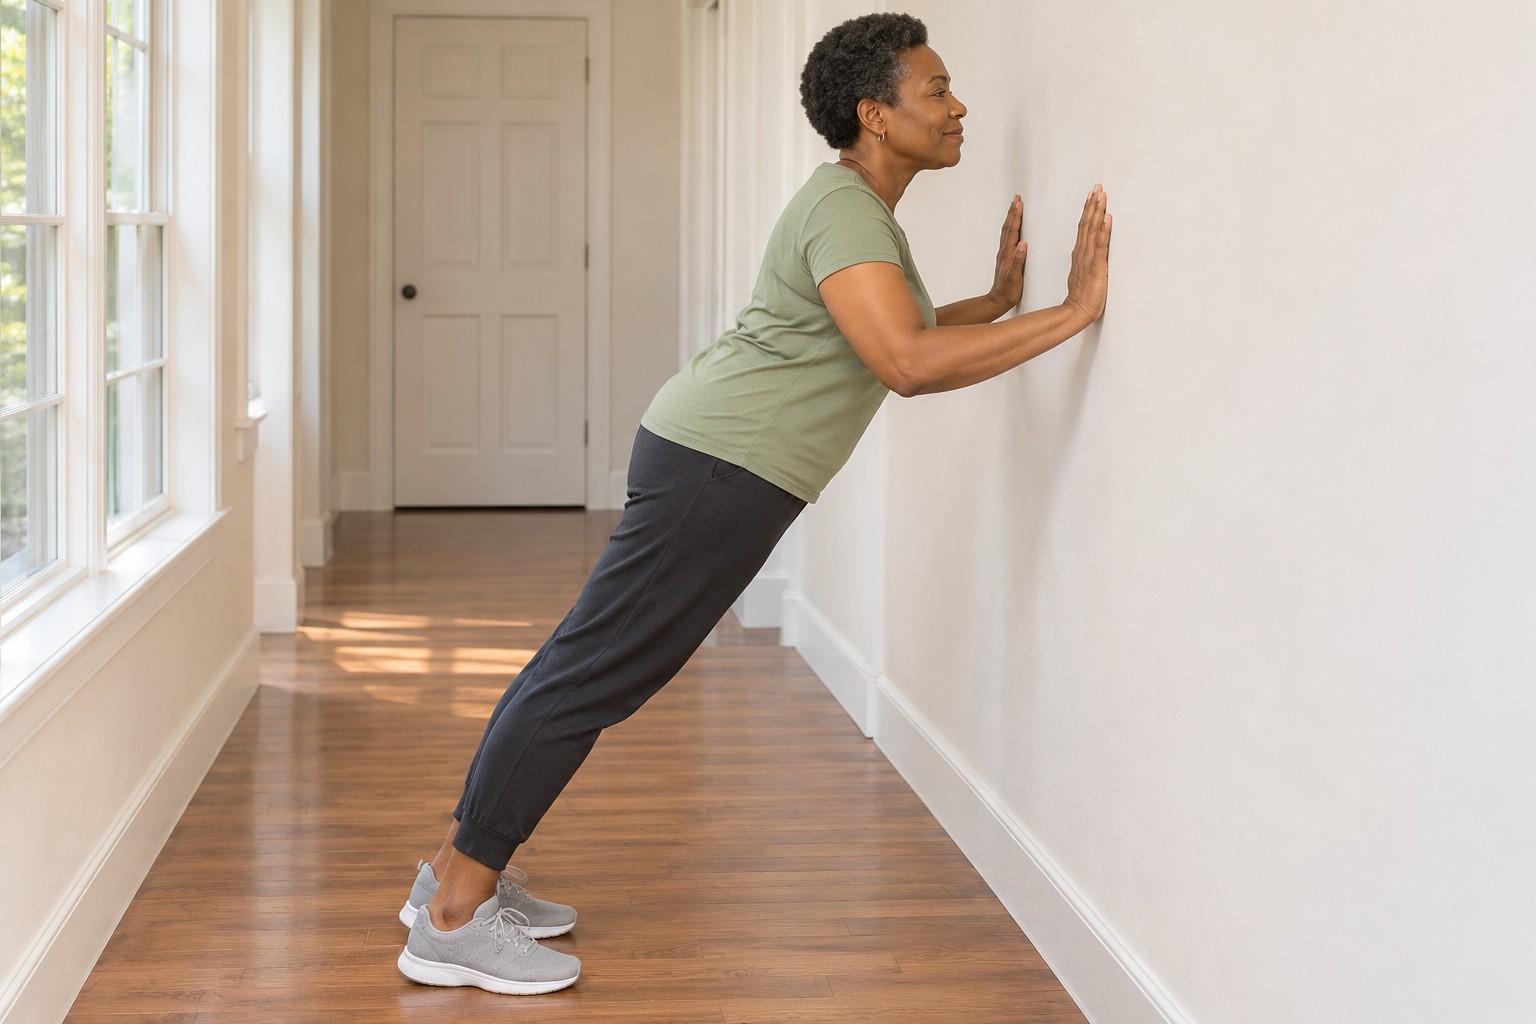
Face the wall and stand close enough to reach it without stretching. Put your palms flat at roughly shoulder height, with your hands about shoulder-width apart. Step back a little so you can stand with your arms extended and your body gently angled toward the wall. Keep both feet on the floor. If you feel as though you are already struggling to hold this position, move closer.
Before bending your arms, notice where your head and hips are. It can help to picture them moving forward together. Stand tall through your trunk and keep your gaze toward the wall. Start somewhere your shoes can grip the floor, especially if the floor is smooth.
Lower slowly and push back
Bend your elbows slowly so your upper body moves toward the wall. Keep your hands in place and your feet planted. You only need to go as far as you can comfortably control. Stop before your face reaches the wall. Then press through your palms to return to the starting position.
Try to make the return as smooth as the descent. Finish with your arms comfortably extended. The CDC guide cautions against locking your elbows at the end. Take a breath and reset your feet if you find that you have shifted or stepped forward. If you need to hurry through the movement to get back up, shorten the next repetition.
A common habit is reaching forward with your chin before your shoulders move. Another is letting your hips stay behind as your chest approaches the wall. Make the motion smaller and see whether you can bring your shoulders and hips forward together. If you have a clear side view in a mirror, glance at your starting position before you begin.
Adjust the difficulty without rushing
Moving closer to the wall reduces the lean and can make it easier to keep the movement smooth. You can also bend your elbows less. If you want more challenge once the movement feels steady, try stepping back a small amount. Change one thing at a time so you can tell how your body responds.
When your hands feel crowded, check whether they have drifted inward. Put them back near shoulder width and see whether the motion feels more comfortable. If a position causes pain, stop and reset. Persistent pain or uncertainty about whether the exercise fits an existing injury is a reason to ask a healthcare professional or physical therapist for guidance.
Try a few unhurried repetitions at first. End the set when you can no longer keep the lowering and pressing motions smooth or need to change your stance to finish. The NHS recommends starting gradually and increasing repetitions over time. Give yourself time to learn the movement before you add more work.
Make your next session easy to repeat
After you find a comfortable starting distance, use a floorboard seam or a spot on the floor to remember where you stood. Next time, use the same setup and see how the first few repetitions feel. You can track whether the motion feels smoother or whether you can bend your elbows a little farther with control, as well as how many repetitions you complete.
The wall version is useful on its own as an upper-body exercise. It also lets you practice a consistent push before deciding whether you want to try a lower, stable surface later. A steady setup makes it easier to see what improved from one session to the next.
Explore the sources
- NHS — Strength exercises ↗
- CDC — Growing Stronger: Strength Training for Older Adults ↗
- MyHealth Alberta — Muscle Conditioning: Exercises ↗
Prepared with AI assistance for True Healthy Products LLC. Sources inform this educational guide; their inclusion does not imply endorsement of our company or products. See our editorial approach.